You must hear this all the time. From doctors, trainers, internet fitness gurus—and yes, probably even from me.
It sounds like an excellent idea. But why?
In my opinion, strengthening your core is vital because the core is the literal “center” of our bodies. Assuming we’re fortunate enough to still be attached to it, it’s involved in almost every movement we make.
That said, instead of talking about a strong core, I prefer the term well-functioning core. A well-functioning core is the essential foundation for a well-functioning body.
“Okay, so where do I start?”
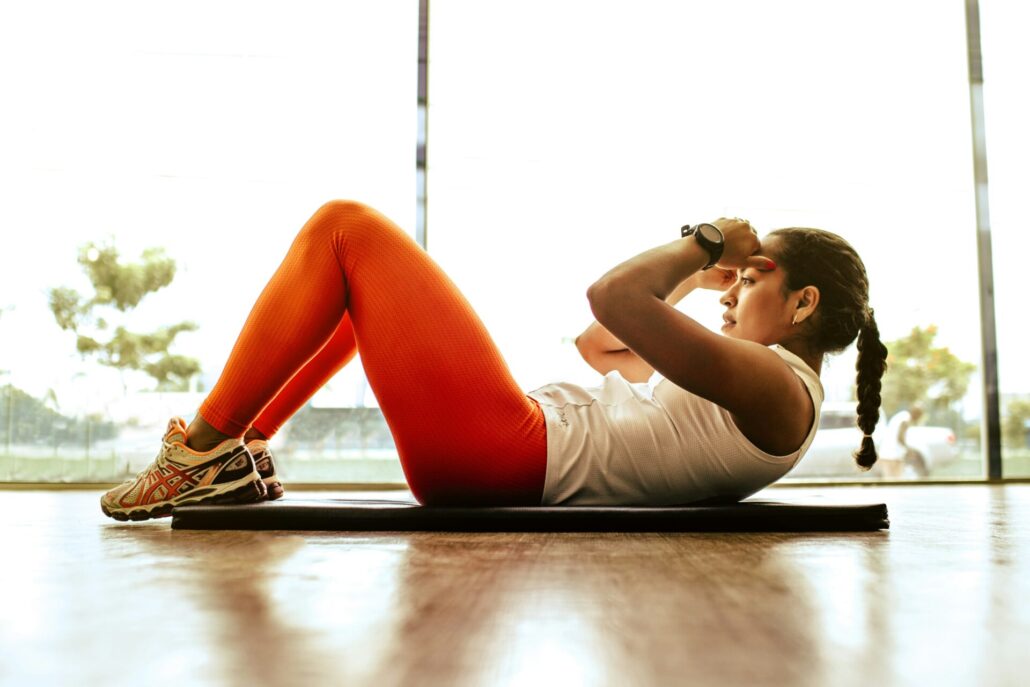
You might think, “I’ll just do a bunch of planks and crunches.” Or better yet, “I’ll take a Pilates class!”
Those are all fantastic options.
You could also hop online, search “core exercises,” or even ask AI to design a workout. You’ll find an endless number of routines. If a generic internet program is all you need to feel great, that’s fantastic—I genuinely wish you the best on your fitness journey.
However, many people set out to strengthen their core because they’re dealing with pain, recovering from an injury, or working toward a very specific physical goal. That’s where generic workouts often fall short, and where we need to start asking better questions.
Over fifteen years as a practicing physiotherapist and certified clinical Pilates, my years before that as a kinesiologist, and—perhaps most importantly—living in my own body have taught me one major truth: Finding the right answers starts with asking the right questions.
Identifying Your “Why”
To get the most out of your training without wasting time, you first need to understand why you want to target your core.
Most goals tend to fall into a few categories:
Relieving back pain
Improving posture
Boosting sports performance
Vanity (hey, no judgment! )
Before jumping into a random routine, ask yourself three questions:
Do you currently have irritable symptoms, such as active back pain?
What is your primary, specific goal?
How much time and effort can you realistically dedicate to this?
A Quick Warning About Pain and Injury
If you’re currently dealing with pain, generic core workouts can sometimes do more harm than good. To strengthen a muscle, you need to challenge its weakness. But if that weakness is already irritated, challenging it the wrong way may simply increase your symptoms.
When working with clients, I always come back to three guiding principles:
“The more irritable a symptom is, the more perfect your movement technique has to be.”
“We all have a technique limit and an absolute limit—and the gap between them is different for everyone.”
“Success comes from understanding where your limits are, so you can challenge yourself without crossing into injury.”
What Does the Core Actually Do?
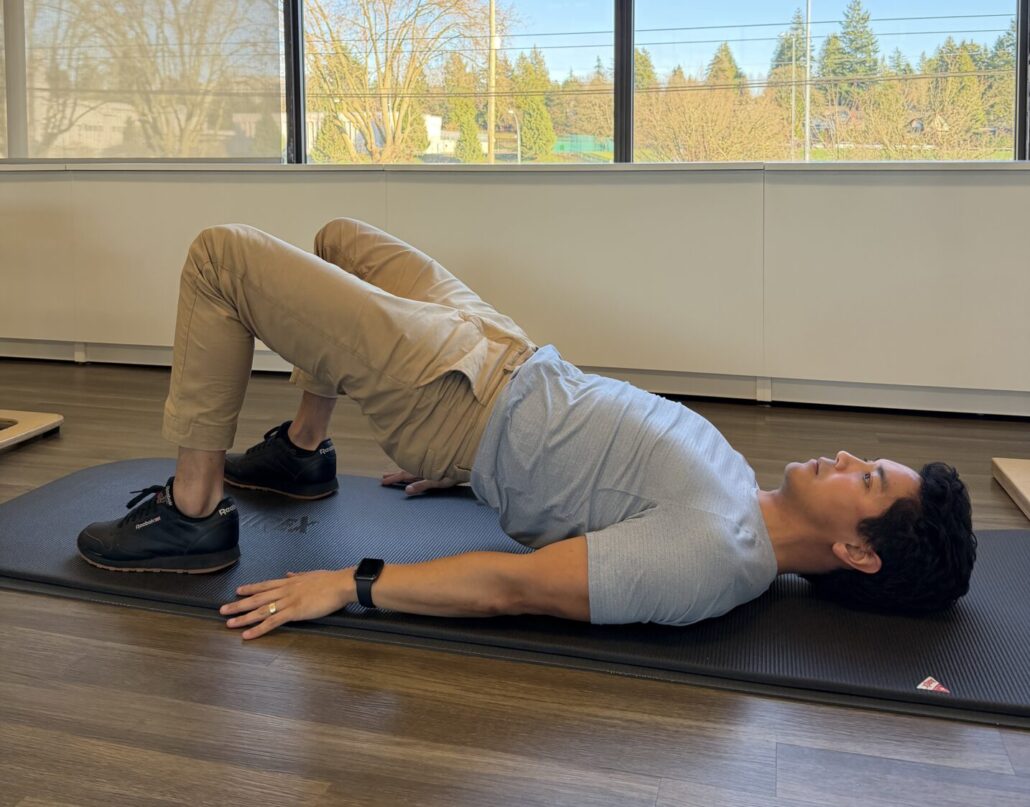
If you’re not dealing with an injury and simply want a stronger body, it helps to understand what your core actually does.
Functionally, your core has two jobs.
It needs to provide a stable base for your arms and legs to generate movement from. At the same time, it also needs enough mobility to let you twist, bend, reach, and move freely.
A well-functioning core is both strong and mobile.
Sometimes it needs to be completely rigid. Other times it has to flex, rotate, and adapt. Real life is a constant shift between those two demands.
Because most of us have limited time, energy, and resources, understanding whether you need to emphasize stability or controlled mobility can help you get far more out of your workouts. Ideally, your routine should include at least a little of both.
The Takeaway
“Strengthen your core” sounds like simple advice, but the body is wonderfully complex.
For the best results, don’t just aim for a stronger core, aim for a better-functioning one by training both stability and controlled mobility.
The internet (and yes, AI!) can be a great place to start. But if you’re dealing with persistent pain, recovering from an injury, or trying to solve a specific physical problem, I’d strongly recommend seeing a qualified professional.
We can help identify your individual limitations, determine what your body actually needs, and build a plan that helps you move better and stay moving.
By Jonathan Poon
Physiotherapist Treloar Physiotherapy Kerrisdale
https://www.treloarphysio.com/wp-content/uploads/2026/07/jonathan-borba-lrQPTQs7nQQ-unsplash.jpg12801920adminhttps://www.treloarphysio.com/wp-content/uploads/2019/09/logo-treloar-physiotherapy-clinic@2x-1.pngadmin2026-07-19 13:16:162026-07-19 16:35:09Everyone Says, "Strengthen Your Core!" But What Does That Actually Mean?
My name is Margaux and I’m a 36-year-old outdoor addict. I was born and raised in Paris and moved to Vancouver a few years ago. Like a lot of people who moved here, I fell in love with the mountains, and hiking/trail running quickly became my favourite hobbies. I adopted my dog Zion a couple years ago and he’s become my favourite hiking partner. I also started running ultras in 2024 and after running a few 50kms and a 100km race, my next goal was to do 100 miles.
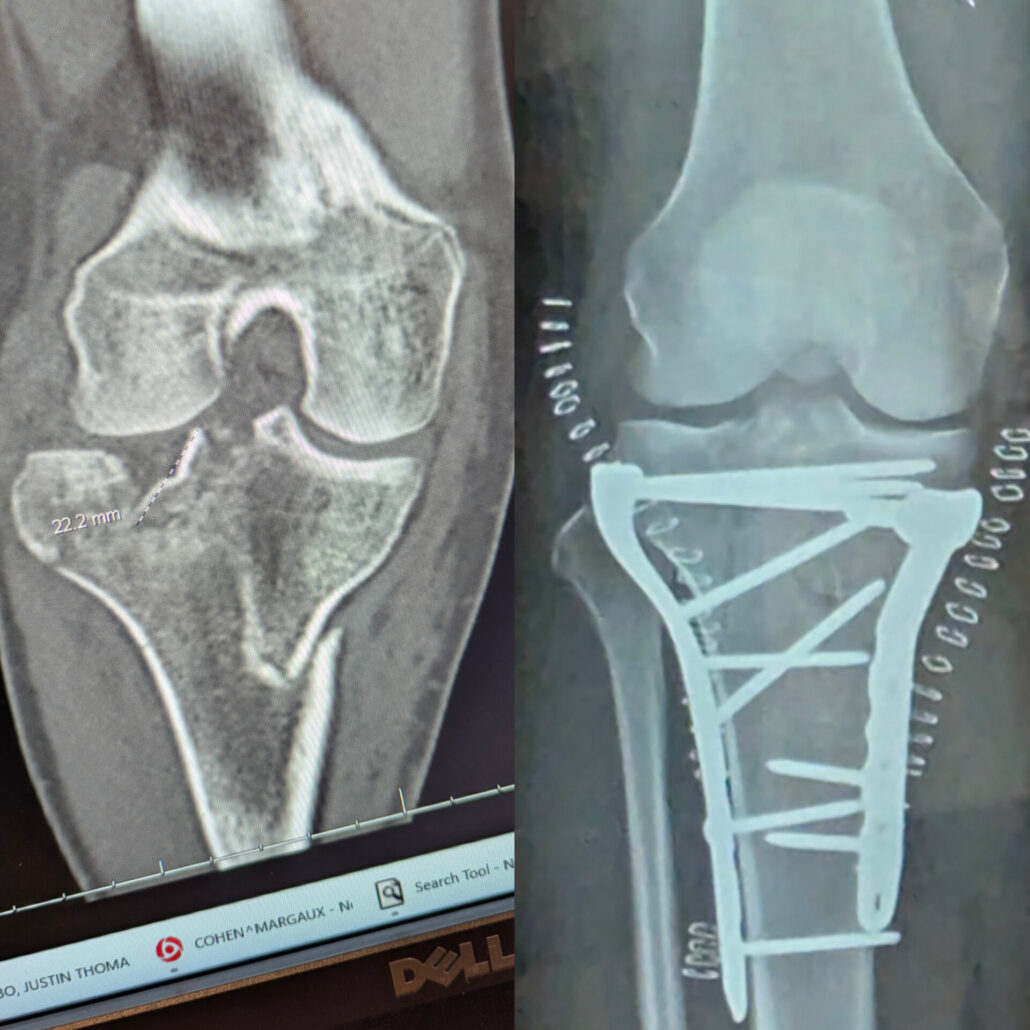
On August 24th, 2025, after summiting Tricouni peak in the Squamish area, myself, Zion and my friend Max were downclimbing a steep wall. Zion lost his footing on a ledge and started falling, and my first instinct was to just grab him by his harness, completely forgetting he is a 85-pound beast. That’s when Zion and I both tumbled down a 60ft cliff.
Luckily enough, Zion was completely unharmed, and I hadn’t lost consciousness. I remember looking at my right leg and knew something was very wrong with it. After waiting a couple hours for Search and Rescue, I was admitted to Lion’s Gate hospital where I went through multiple CT scans. My head was fine but the verdict for my leg, not so good. Tibial plateau fracture type VI. I had never heard of it before and found out it only represents 2% of all fractures. Because of the swelling, they couldn’t operate just yet so I spent the next 10 days with an external fixator, laying in bed. The surgeon told me it is one of the worst injuries you can do to your leg and the recovery can be extremely long (up to 18 months). He told me I couldn’t expect to do much physical activities for 6 months, and probably a year before I could run again. The surgery went well and I was now the proud “owner” of 2 plates and 10 screws in my leg. Now this is where things get rough, I wasn’t allowed to put any weight on my leg for the next 12 weeks and I had lost all range of motion in my knee. For someone as active as me it felt like a death sentence. All I could do was hop on one leg with a walker. I was told I could start physiotherapy straight away and my mission was to find a physiotherapist experienced with knee injuries and with a running background.
I will always remember my first appointment with Jen at Treloar Physiotherapy. I was struggling with my walker and the first words she said to me were “you’re doing so good”, and for some reason it was the most reassuring thing I had heard since my accident 3 weeks before. After a few tears and expressing my fears to her she explained how we were going to work together to build my strength back. The first 7 weeks, we mostly worked on my range of motion and then started incorporating some light strength training. I was seeing Jen every week and we were making really good progress. At 11 weeks I got some of the best news. I could finally walk without assistance and hike again! What I love about Jen is how much she cares. I could tell she was as excited as I was for me to walk again. After another 12 weeks and an impressive recovery so far, I was told I could run again! Only 6 months post-surgery.
I will never forget my first run back when Jen put me on the treadmill and I just started running, like I had never stopped. I am 9 months post surgery now and I would say 90% back to what I was before the injury. And I can say with certainty that I wouldn’t be this far in my recovery if it wasn’t for Jen. She saw me at my most vulnerable state, she believed in me and she gave me the mental strength I needed to push myself and get better. Recovery can be extremely lonely and she made it so much easier to handle. She’s definitely one of the silver linings that came out of my terrible accident and I would like to believe that we have become friends after all these months working together, so thank you so much Jen!
By Margaux Cohen Client Treloar Physiotherapy Clinic
https://www.treloarphysio.com/wp-content/uploads/2026/06/PXL_20250713_121510721-2.jpg19201446adminhttps://www.treloarphysio.com/wp-content/uploads/2019/09/logo-treloar-physiotherapy-clinic@2x-1.pngadmin2026-06-12 16:19:482026-06-12 19:56:18Client Stories: Margaux's Journey Back to Running After a Tibial Plateau Fracture
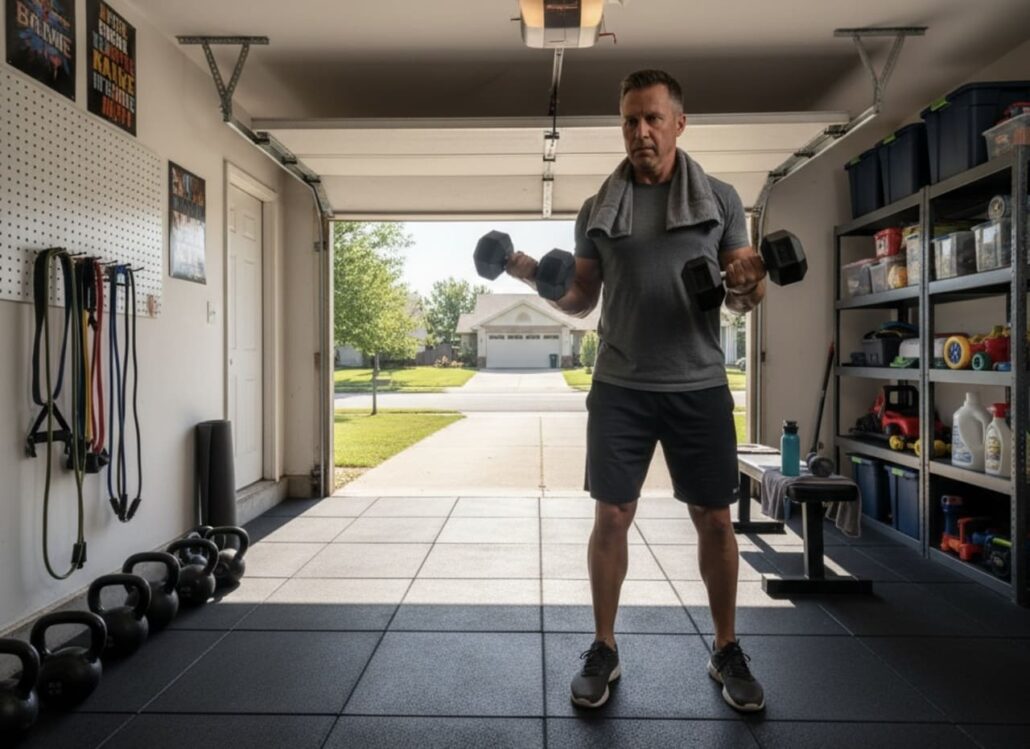
Personalized strength training helps active adults and weekend warriors manage the dual demands of physically demanding jobs and weekend activities while reducing common pain in the lower back, knees, and neck. A targeted approach focuses on functional movements, core stability, and progressive loading to build resilience without overwhelming already busy schedules.
────────────────────────────────────────────
Between juggling demanding careers and staying active on weekends, active adults face unique physical challenges. You might recognize this scenario: long hours at a physically demanding job followed by weekend hikes, hockey games, or tennis matches, only to wake up Monday morning with a stiff back or aching knees.
The solution isn’t choosing between your career and staying active. Instead, tailored strength training offers a strategic approach to support both your work demands and recreational pursuits while addressing the common pain patterns that develop when your body handles multiple physical stresses.
We’ll explore how personalized strength programs address the specific needs of weekend warriors, provide practical strategies for injury prevention, and help you maintain long-term physical resilience without sacrificing career advancement or personal time.
What Physical Challenges Do Active Adults Face?
Active adults and weekend warriors often manage a complex combination of physical demands that create unique stress patterns on the body. Your weekdays might involve prolonged sitting at a desk, repetitive manual labor, or standing for extended periods, while weekends bring completely different challenges through running, cycling, hiking, or recreational sports like tennis, basketball, or pickleball.
This dual lifestyle frequently leads to predictable problem areas. Lower back pain develops from prolonged sitting combined with sudden weekend activity bursts. Knee discomfort emerges when desk-weakened glutes and tight hip flexors meet the demands of running or court sports. Neck and shoulder tension builds from poor posture during work hours, then gets aggravated by cycling positions or overhead sports movements.
The transition between sedentary work periods and high-intensity weekend activities creates a pattern of deconditioning followed by overuse. Your body adapts to workplace postures and movement patterns during the week, then faces dramatically different demands when you hit the trails or courts. This cycle often results in the “weekend warrior” syndrome, where enthusiasm for activity exceeds current physical preparation.
How Does Tailored Strength Training Benefit Weekend Warriors?
Personalized strength training addresses the specific movement patterns and muscle groups that support both your work activities and recreational pursuits. Unlike generic fitness programs, tailored approaches consider your job requirements, preferred activities, current pain patterns, and available training time to create sustainable results.
For active adults dealing with physically demanding jobs, strength training builds the muscular endurance needed to maintain proper movement patterns throughout long workdays. This reduces the cumulative stress that leads to overuse injuries and chronic pain. When your core muscles adequately support your spine during lifting tasks, and your leg muscles maintain proper alignment during prolonged standing, you experience less fatigue and discomfort.
The postural benefits extend beyond work hours. Strengthening the posterior chain muscles (glutes, hamstrings, and upper back) counteracts the forward head posture and rounded shoulders common in desk workers. This improved alignment translates directly to better performance in recreational activities and reduced injury risk during sports.
Strength training also builds resilience for weekend activities. When your body maintains adequate strength levels throughout the week, the transition to hiking, cycling, or court sports becomes less jarring. Your muscles, tendons, and joints adapt more effectively to varying demands, reducing the likelihood of acute injuries or overuse problems.
Effective strength training for weekend warriors emphasizes functional movements that mirror real-life activities. Squatting patterns support everything from lifting heavy objects to getting up from chairs to powering through cycling climbs. Hip hinge movements translate to safe lifting at work and explosive movements in sports. Upper body pulling exercises counteract prolonged sitting postures while building strength for activities like rock climbing or swimming.
What Should Your Personalized Strength Training Include?
Creating an effective strength program starts with assessing your specific lifestyle demands, movement limitations, and pain patterns. Your routine should address the muscle groups most affected by your work environment while preparing your body for recreational activities.
Core strengthening forms the foundation of any program for active adults. This goes beyond traditional crunches to include exercises that stabilize your spine during movement. Planks, dead bugs, and bird dogs build the deep stability needed for both prolonged sitting and dynamic sports activities. Anti-rotation exercises like Palloff presses prepare your core for the asymmetrical demands of activities like tennis or hockey.
Lower body conditioning should emphasize both strength and mobility. Squats and lunges in multiple planes of motion prepare your legs for the varied demands of hiking, running, and court sports. Single-leg exercises address the balance and stability requirements of activities like cycling and basketball while identifying and correcting strength imbalances between sides.
Upper body training needs to balance pushing and pulling movements. For every hour spent in forward head posture at work, your program should emphasize posterior chain strengthening through rows, pull-ups, and reverse flies. This creates the muscular balance needed to maintain good posture during long work days and support overhead activities like tennis serves or volleyball spikes.
Training Component
Work Application
Recreation Benefit
Example Exercises
Core Stability
Spinal support during lifting/sitting
Power transfer in sports
Planks, Dead bugs, Pallof press
Hip Strength
Proper lifting mechanics
Running/cycling power
Squats, Lunges, Hip thrusts
Posterior Chain
Posture maintenance
Athletic performance
Rows, Pull-ups, Reverse flies
Single-leg Balance
Stability during movement
Injury prevention in sports
Single-leg RDLs, Lateral lunges
Schedule Integration Strategies
Time constraints represent the biggest challenge for active adults. Your program needs to fit realistically into your schedule to ensure consistency. Three 30-minute sessions per week often prove more sustainable than longer, less frequent workouts. Morning sessions before the workday begins or lunch break workouts provide consistent scheduling opportunities.
How Does Strength Training Prevent Common Injuries?
Injury prevention through strength training works by addressing the underlying physical weaknesses that make you susceptible to pain and injury. Most common problems in active adults stem from muscle imbalances, movement dysfunction, or inadequate conditioning for activity demands.
Lower back pain often results from weak glutes and deep core muscles combined with tight hip flexors from prolonged sitting. Targeted strengthening of the posterior chain while addressing hip mobility creates better spinal alignment and load distribution. This reduces stress on sensitive structures like discs and facet joints during both work tasks and recreational activities.
Knee pain frequently develops when hip weakness forces the knee joint to compensate during movement. Strengthening the glutes and addressing ankle mobility improves the kinetic chain function, reducing abnormal stress on knee structures. This proves particularly important for running, hiking, and court sports where repetitive knee loading occurs.
Neck and shoulder problems in weekend warriors typically stem from prolonged poor posture combined with sudden demands during sports. Strengthening the deep neck flexors and upper back muscles while improving thoracic spine mobility addresses both the postural component and prepares the region for dynamic activities.
Injury prevention extends beyond building strength to include movement quality improvement. Learning proper lifting mechanics protects your back during work tasks while ensuring efficient movement patterns during sports. Regular assessment and correction of movement compensations prevents small problems from developing into chronic issues.
How Do You Maintain Long-Term Physical Resilience?
Sustaining an active lifestyle while managing work demands requires a long-term approach that adapts to changing circumstances. Your strength training program should evolve with your career demands and recreational interests while maintaining the fundamental principles that support your overall physical health.
Progressive overload remains essential, but for busy adults, this often means increasing movement quality or exercise complexity rather than constantly adding weight. Advancing from basic squats to single-leg variations or adding instability challenges provides continued adaptation without requiring gym upgrades or longer workout sessions.
Periodization becomes crucial when balancing multiple physical demands. Your training should complement your activity schedule rather than competing with it. During busy work periods, maintenance-level strength training preserves your conditioning base. When recreational activities intensify, your program should support rather than fatigue the muscles needed for performance.
Listening to your body develops into a critical skill for long-term success. Learning to distinguish between normal training fatigue and early warning signs of overuse helps you adjust your program before problems develop. This includes recognizing when work stress or high-intensity weekends require modified training approaches.
Building physical resilience also involves developing support systems and knowledge resources. Understanding basic exercise modifications allows you to maintain your routine when equipment access changes or time constraints shift. This flexibility ensures consistency even when life circumstances fluctuate.
Active adults and weekend warriors face unique physical challenges from combining sedentary or physically demanding work with weekend recreational activities, leading to predictable pain patterns in the lower back, knees, and neck.
Tailored strength training bridges the gap between work demands and recreational activities by building functional strength, improving posture, and creating resilience for varied physical stresses.
Effective programs emphasize core stability, hip strength, and posterior chain conditioning while using compound movements that maximize training efficiency within limited time schedules.
Injury prevention occurs through addressing muscle imbalances and movement dysfunctions that develop from workplace postures and sudden weekend activity transitions.
Long-term success requires progressive program adaptation, smart periodization around life demands, and developing the skill to modify training based on changing circumstances.
Consistency with shorter, focused training sessions proves more beneficial than sporadic longer workouts for busy weekend warriors managing multiple responsibilities.
Ready to Build Your Personalized Strength Foundation?
Managing the physical demands of an active lifestyle doesn’t require choosing between your career success and staying active. With the right approach to strength training, you address both work-related physical stresses and recreational activity preparation while preventing the common pain patterns that slow you down.
At Treloar Physiotherapy Clinic, we understand the unique challenges facing active adults and weekend warriors in Vancouver. Our approach combines over 40 years of clinical experience with modern, evidence-based training methods to create personalized programs that fit your schedule and address your specific needs.
Whether you’re dealing with current pain issues or want to prevent future problems while maintaining your active lifestyle, we help you build the strength and resilience needed to excel at work, enjoy recreational activities, and stay moving for years to come.
Frequently Asked Questions
How can strength training help prevent low back pain for adults with physically demanding jobs?
Strength training prevents low back pain by building core stability and posterior chain strength that supports proper spinal alignment during work tasks. Targeted exercises like planks, hip hinges, and glute strengthening create muscular support that reduces stress on spinal structures during lifting, prolonged standing, or repetitive movements. This conditioning helps maintain proper movement patterns throughout long workdays, preventing the cumulative stress that leads to chronic back pain.
What kind of strength training exercises are best for improving posture while balancing an active lifestyle?
The most effective exercises for posture improvement focus on strengthening the posterior chain while stretching tight anterior muscles. Rows, reverse flies, and upper back exercises counteract forward head posture from desk work, while hip flexor stretches and glute strengthening address lower body imbalances. Compound movements like deadlifts and squats provide comprehensive postural benefits while fitting efficiently into busy schedules, typically requiring only 20-30 minutes per session.
How often should weekend warriors engage in strength training to support their work and hobbies safely?
Active adults benefit most from 2-3 strength training sessions per week, focusing on full-body compound movements that address both work-related and recreational demands. This frequency allows adequate recovery between sessions while building the consistent strength base needed to support varied activities. Sessions lasting 30-45 minutes provide sufficient stimulus for strength gains and injury prevention without overwhelming already busy schedules or competing with recreational activities.
https://www.treloarphysio.com/wp-content/uploads/2026/06/tailored-strength-training-for-active-adults-vancouver.jpeg9311280Victor Choyhttps://www.treloarphysio.com/wp-content/uploads/2019/09/logo-treloar-physiotherapy-clinic@2x-1.pngVictor Choy2026-06-10 23:47:552026-06-11 23:13:41How Tailored Strength Training Supports Active Adults and Weekend Warriors Balance Physical Work and Hobbies in Vancouver
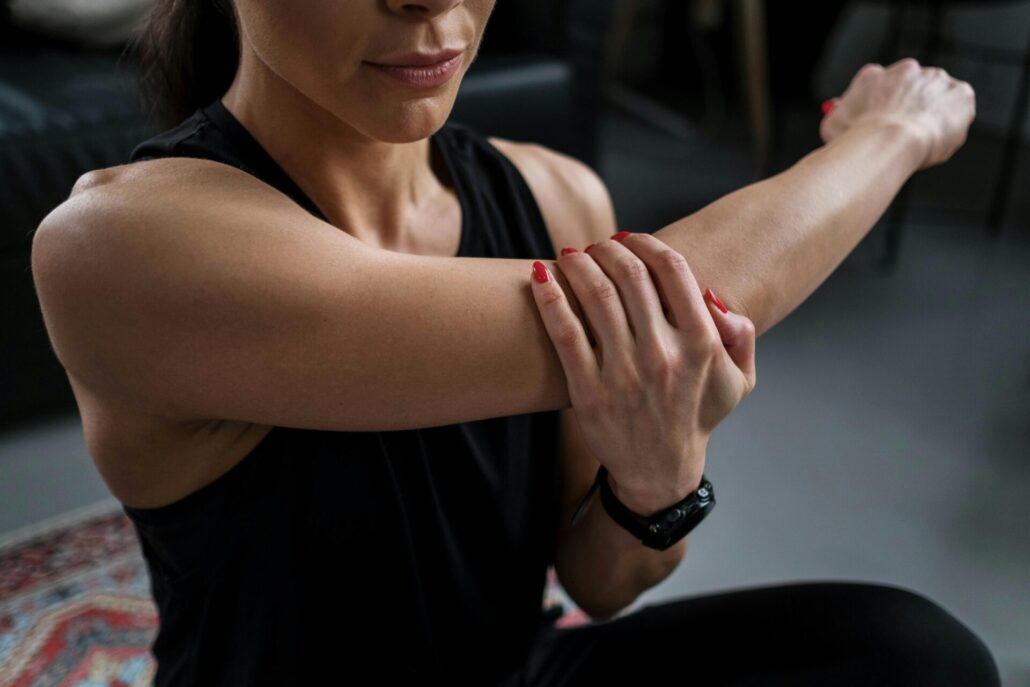
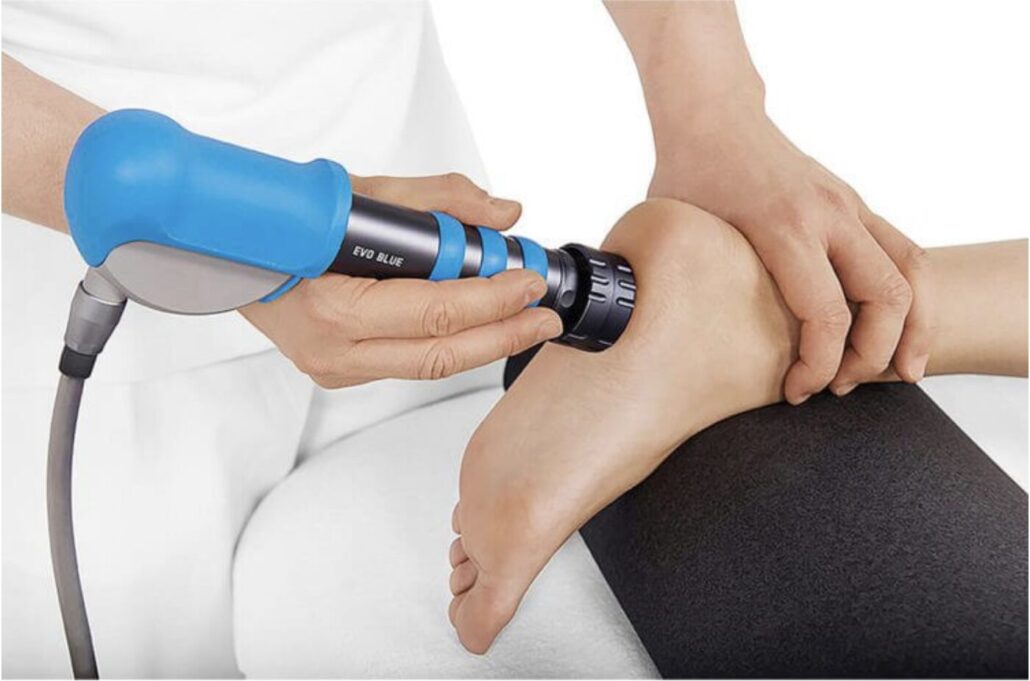
Chronic tendon and connective tissue pain can persist despite rest or activity modification, often interfering with daily activities, exercise, and work. Two common conditions treated in physiotherapy are plantar fasciitis (heel pain) and lateral epicondylitis (tennis elbow), both commonly linked to repetitive strain and tissue overload.
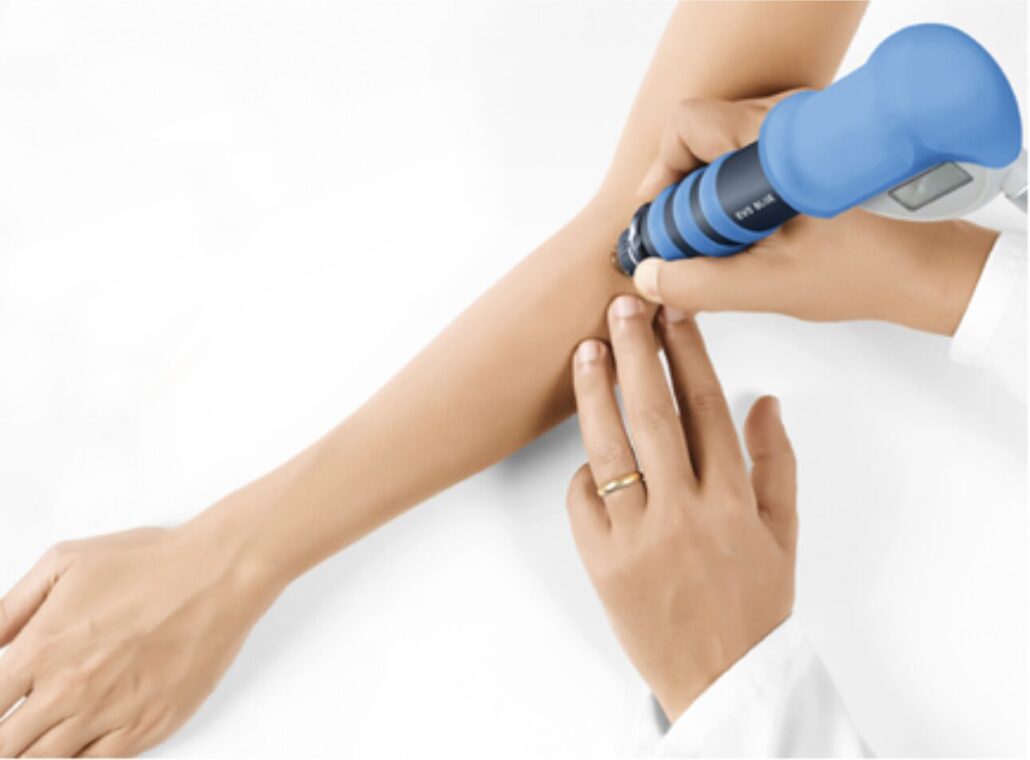
Shockwave Therapy, also known as Extracorporeal Shockwave Therapy (ESWT), is a non-invasive treatment used to help manage persistent tendon-related pain. The treatment uses low-energy sound waves to stimulate the body’s natural healing response, helping improve blood flow, reduce pain sensitivity, and support tissue repair. Treatment is delivered through a handheld device that applies targeted pulses to the affected area and is generally well tolerated with minimal downtime.
Plantar fasciitis occurs when the tissue along the bottom of the foot becomes irritated and overloaded. Common symptoms include sharp pain with the first steps in the morning, heel pain after prolonged standing, discomfort with walking or running, and tightness in the calf or foot.
Tennis elbow involves irritation of the tendons on the outside of the elbow and is often associated with repetitive gripping, lifting, racquet sports, gym training, or desk work. Symptoms commonly include pain on the outside of the elbow, reduced grip strength, and discomfort with lifting or carrying activities.
Shockwave Therapy may be beneficial for chronic cases of both heel pain or tennis elbow that have not fully responded to physiotherapy, exercise, or activity modification alone. It is most effective when combined with a comprehensive rehabilitation program that may include strengthening exercises, mobility work, and gradual return to activity.
If you are experiencing ongoing heel or elbow pain, a physiotherapy assessment can help determine whether Shockwave Therapy may be an appropriate treatment option for you!
By Alexia Lee Physiotherapist Treloar Physiotherapy Kerrisdale
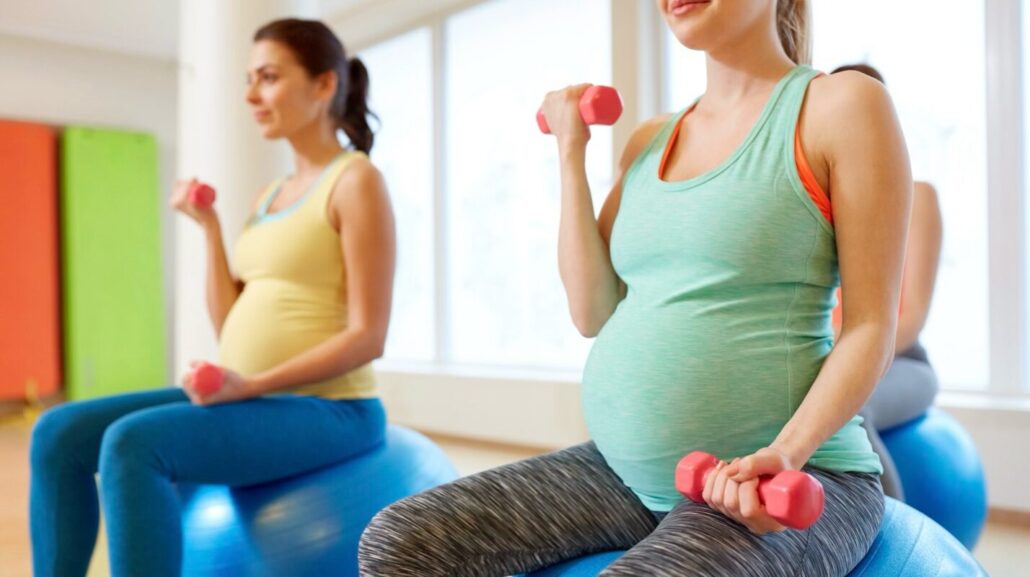
Pregnancy doesn’t mean stopping exercise, it means learning how to move in a way that supports your changing body. Staying active during pregnancy is safe and beneficial for most people without medical restrictions. If you’re unsure, check with your healthcare provider before starting or continuing exercise.
Let’s debunk some common myths about physical activity during pregnancy…Exercise is not associated with an increased risk of pregnancy loss or premature delivery, or low birth weight. In fact, research shows that regular exercise can help reduce the risk of gestational diabetes, hypertension, and pre-eclampsia. It can also help decrease the severity of pelvic girdle pain and lower back pain.
So, what should exercise look like during pregnancy? Current recommendations suggest aiming for 150 minutes of moderate-intensity physical activity per week, spread out over at least 3 days. This should include a combination of aerobic exercise and resistance training. It’s also recommended to incorporate yoga, light stretching, and pelvic floor exercises into your routine. If this amount of exercise feels difficult to achieve, don’t worry, any amount of movement still provides meaningful benefits!
What does moderate intensity feel like? A good guideline is the “talk test”. You should be able to carry on a simple conversation, but not sing. Lower-impact aerobic options include walking, swimming, and stationary cycling.
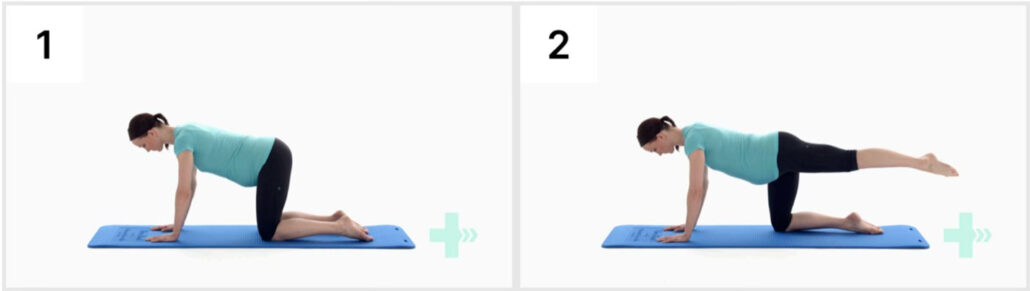
Some safe resistance training options include:
4-point leg lifts: Start on your hands and knees. Tighten your core muscles, keep your spine stable as you lift one leg.
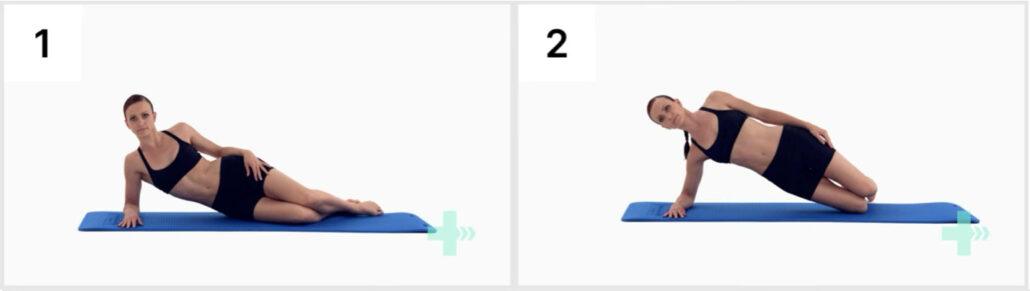
Side plank on knees: Start lying on your side, supported on one elbow and your knees. Engage your core and glutes to lift your hips off the mat, keeping your body in a straight line from head to knees.
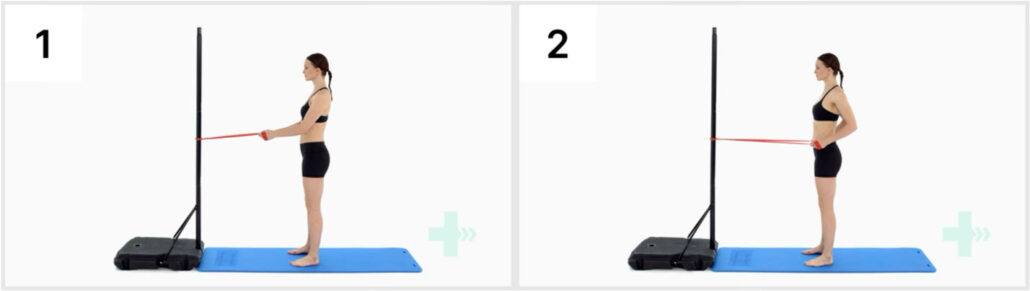
Seated rows with a resistance band: Use your shoulder blades and the backs of your shoulders to pull your elbows back.
Benefits of Pelvic Floor Physiotherapy During Pregnancy
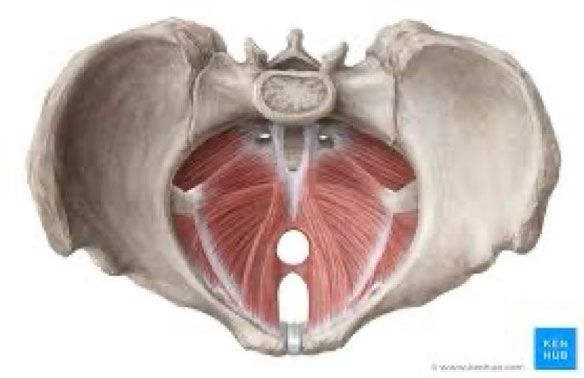
Your pelvic floor muscles sit at the bottom of your pelvis and act like a hammock, supporting your pelvic organs, including your bladder, bowel, and uterus. Pelvic floor physiotherapy can help you learn how to properly contract and relax these muscles, while also improving their strength and coordination.
Strengthening the pelvic floor is important during pregnancy to help support the growing weight of your baby, reduce the risk of urinary incontinence (leakage), and provide support for your pelvis and lower back.
However, strength is only part of the picture. During childbirth, the pelvic floor needs to fully relax and stretch to allow the baby to pass through. Research shows that pelvic floor physiotherapy can help shorten the second stage of labour and reduce the risk of severe perineal tearing.
Book an appointment with one of our trained pelvic floor physiotherapists to get personalized guidance on how to safely exercise during pregnancy and prepare your pelvic floor for delivery!
https://www.treloarphysio.com/wp-content/uploads/2026/04/pexels-gustavo-fring-3984357.jpg12801920adminhttps://www.treloarphysio.com/wp-content/uploads/2019/09/logo-treloar-physiotherapy-clinic@2x-1.pngadmin2026-04-12 14:18:482026-04-12 14:30:17Pelvic Floor Physiotherapy and Safe Exercise During Pregnancy
Pregnancy and childbirth place significant stress on the pelvic floor, which are the group of muscles that support the bladder, uterus, and bowel. These muscles also work together with the diaphragm, deep abdominal muscles, and hips to support posture, bladder control, and core stability.
After delivery, the pelvic floor can become weakened, stretched, or overly tight. Pelvic floor physiotherapy focuses on restoring strength, coordination, and mobility so new mothers can return to daily activities and exercise safely and confidently.
5 Common Signs You May Benefit from Pelvic Floor Physiotherapy Post-Partum
1. Urinary leakage – Leaking urine when coughing, sneezing, laughing, or exercising is very common after childbirth. This happens when the pelvic floor muscles are not strong or coordinated enough to support the bladder during pressure.
2. Pelvic region heaviness or pressure – A feeling of heaviness, pressure, or a “bulging” sensation in the pelvic area can occur when the muscles and tissues supporting the pelvic organs are weakened.
3. Pain in the pelvis, hips, or tailbone – Some women continue to experience discomfort in the pelvic region, hips, or tailbone after giving birth. This can be related to muscle tightness, joint strain, or changes in posture that developed during pregnancy.
4. Pain with intercourse – Pain during intercourse can happen after childbirth due to pelvic floor muscle tightness, scar tissue, or sensitivity in the surrounding muscles.
5. Difficulty returning to exercise – If activities such as running, lifting, or higher-impact workouts cause pelvic region pressure, pain, or leakage, the pelvic floor and core muscles may need rehabilitation before safely progressing.
3 Common Myths About Post-Partum Pelvic Floor Recovery
Myth 1:“Leaking after childbirth is normal and nothing can be done.”
While leakage is common after pregnancy, it is not something women need to live with! Pelvic floor physiotherapy can significantly improve or resolve these symptoms.
Myth 2: “Kegels are the only exercise you need.”
Pelvic floor recovery involves more than just Kegels. The pelvic floor works together with breathing muscles, deep abdominal muscles, and the hips. A full rehabilitation program focuses on strengthening and coordinating this entire system.
Myth 3:“C-sections don’t affect the pelvic floor.”
Even without a vaginal delivery, pregnancy itself places a lot of pressure on the pelvic floor. Women who deliver by C-section can still experience pelvic floor weakness or dysfunction.
What does post-partum physiotherapy look like?
1. Targeted Pelvic Floor Mucle and Core-Abdominal Exercises
Individualized exercise programs are the foundation of pelvic floor rehabilitation. These exercises help restore strength, endurance, and coordination in the pelvic floor while also strengthening the deep core muscles.
Treatment often includes (but limited to):
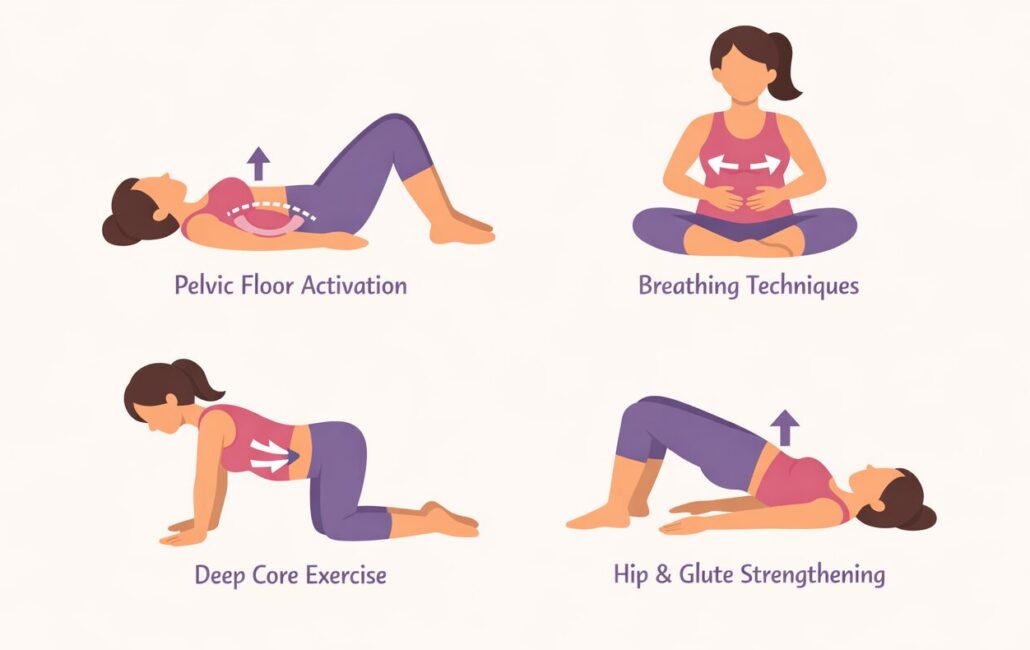
pelvic floor muscle activation, strengthening and relaxation exercises
breathing techniques that coordinate the diaphragm and pelvic floor
deep core muscle activation - progressive strengthening of the hips and gluteal muscles
By improving how these muscles work together, physiotherapy helps support the bladder and pelvic organs while allowing women to safely return to activities like lifting, running, and exercise.
2. Intramuscular Stimulation (IMS)
Intramuscular stimulation (IMS), also known as dry-needling, is a technique sometimes used to treat tight or irritated muscles. Very thin needles are inserted into specific muscles around the hips, lower back, or pelvis to help release tension and improve muscle function.
For some women experiencing postpartum pelvic pain or persistent lower back pain, IMS can help:
reduce muscle tension
improve circulation in the affected muscles
decrease pain related to muscle tightness or trigger points
IMS is typically used in conjunction with exercise therapy as part of a comprehensive physiotherapy treatment plan.
3. Clinical Pilates
Clinical Pilates is often used in physiotherapy to retrain core stability and movement control. The exercises focus on slow, controlled movements that integrate breathing, pelvic floor muscle activation, and deep abdominal strength.
Clinical Pilates can help: - rebuild core stability after pregnancy - improve posture and spinal support - gradually prepare the body to return to regular exercise
Because the movements are low-impact and carefully guided, Clinical Pilates is often a helpful bridge between early recovery and returning to higher-intensity activity.
When Should You Seek Help?
Many healthcare providers recommend a pelvic floor physiotherapy assessment around six weeks after childbirth, but treatment can still be helpful months or even years after delivery if symptoms persist.
Early assessment can help identify muscle weakness, tension, or coordination issues so that recovery can be guided safely and effectively. Pelvic floor physiotherapy helps many women return to daily activities and exercise with greater comfort and confidence.
By Chelsea Chua Physiotherapist Treloar Physiotherapy Kerrisdale
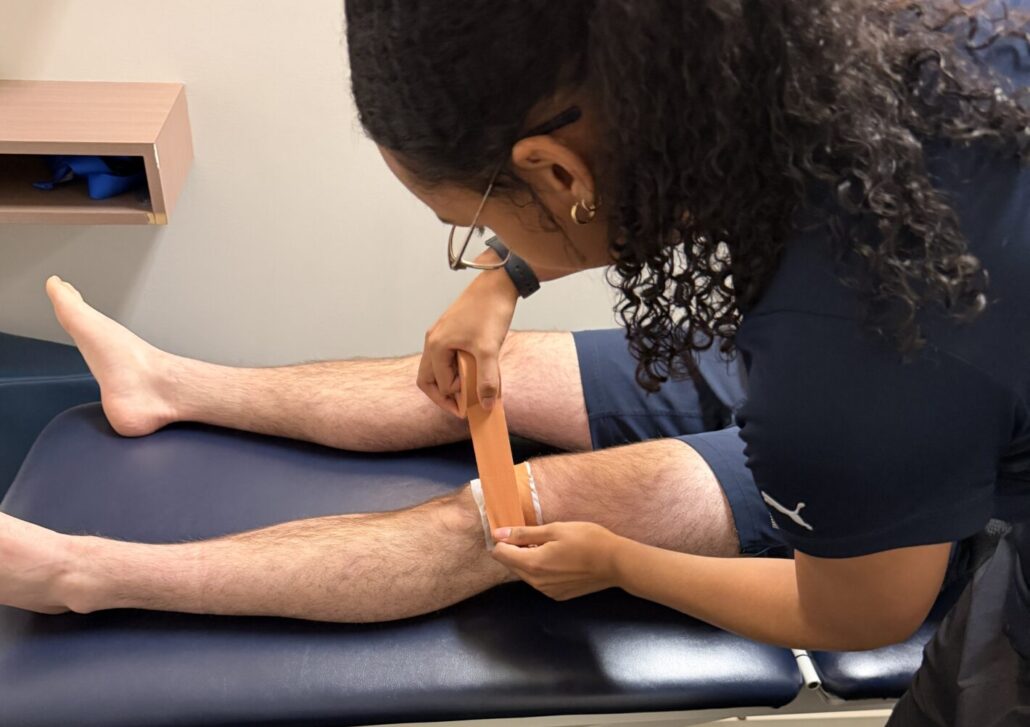
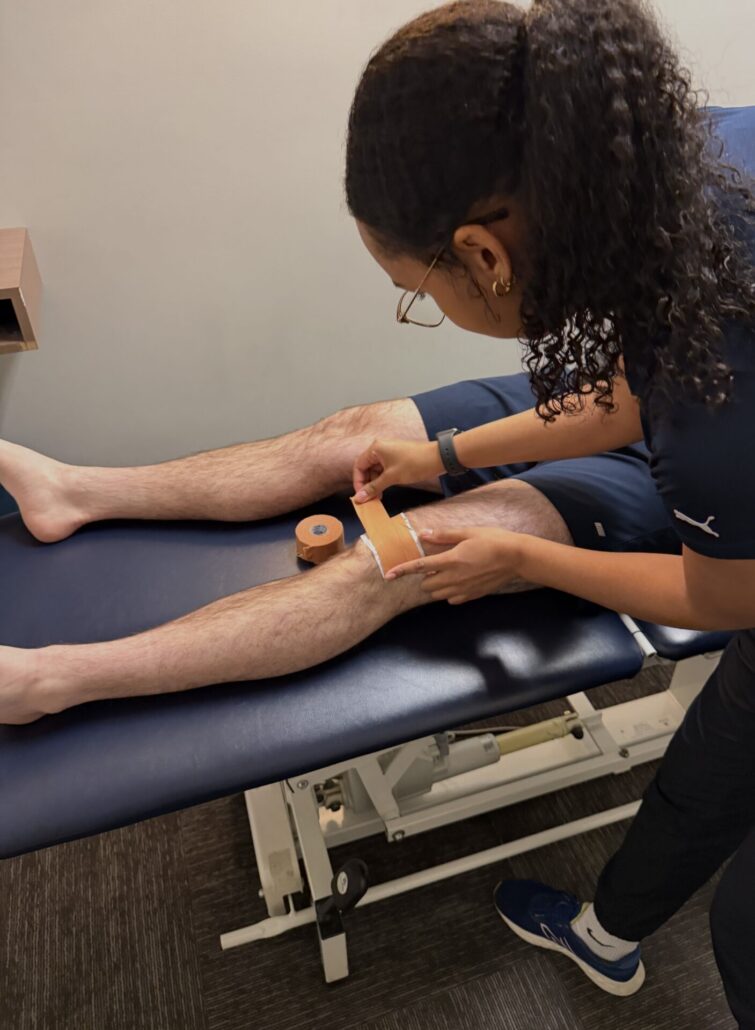
You may have seen athletes covered in bright, colourful tape and wondered- does that really work?
This past year, I spent a lot of time doing sports coverage, and naturally became very familiar with taping. In physiotherapy, taping can be used as a method to manage pain or to help patients feel more confident returning to activity. In this post, I want to break down its purpose, what the research says, and how it could potentially fit into your rehabilitation plan.
Purpose of Taping
Taping can be a very beneficial tool in a treatment plan, but it is not necessarily the best fit for every patient/ injury. The goal of taping can be to help manage pain/modify symptoms, provide sensory feedback, or support return to activity/ sport. The idea of taping is not to “fix” the problem, but to be used as a modality within a management plan.
Types:
Rigid taping: involves stiffer straps like leukotape or athletic tape (zinc oxide). Often used to limit excessive motion in joints and provide mechanical support (ex. Closed basket ankle taping).
Kinesio (elastic) taping:stretchable tape designed to allow for more movement and provide sensory feedback.
What does the evidence say?
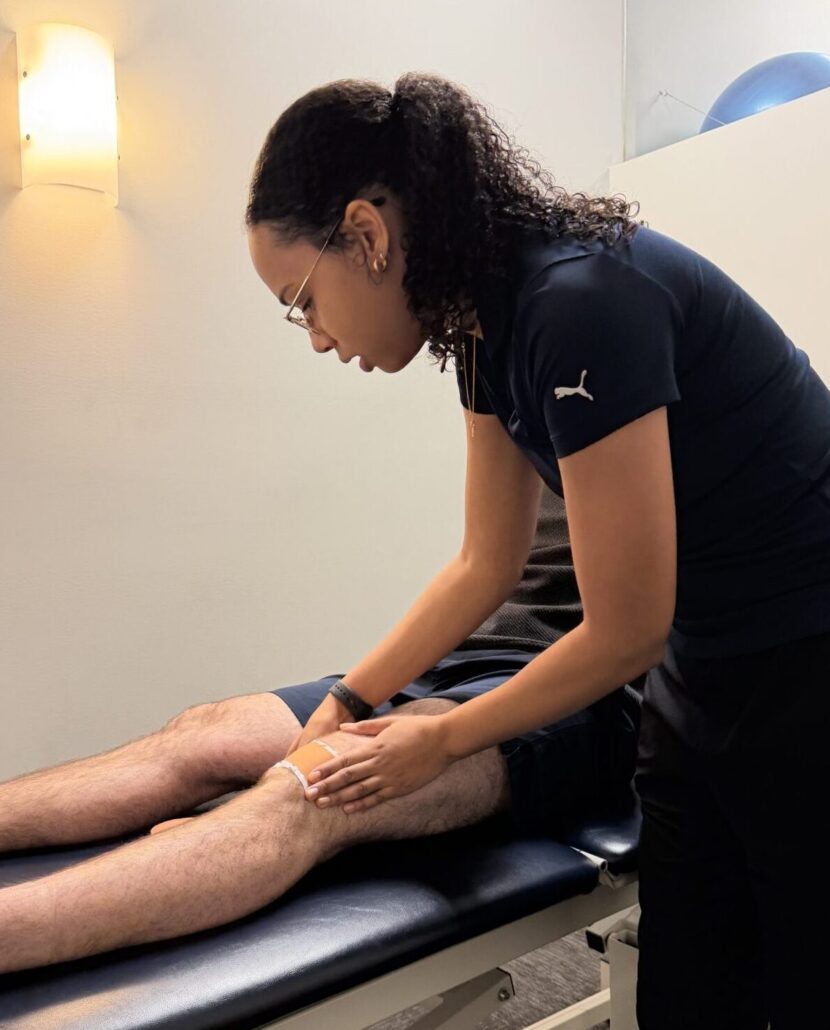
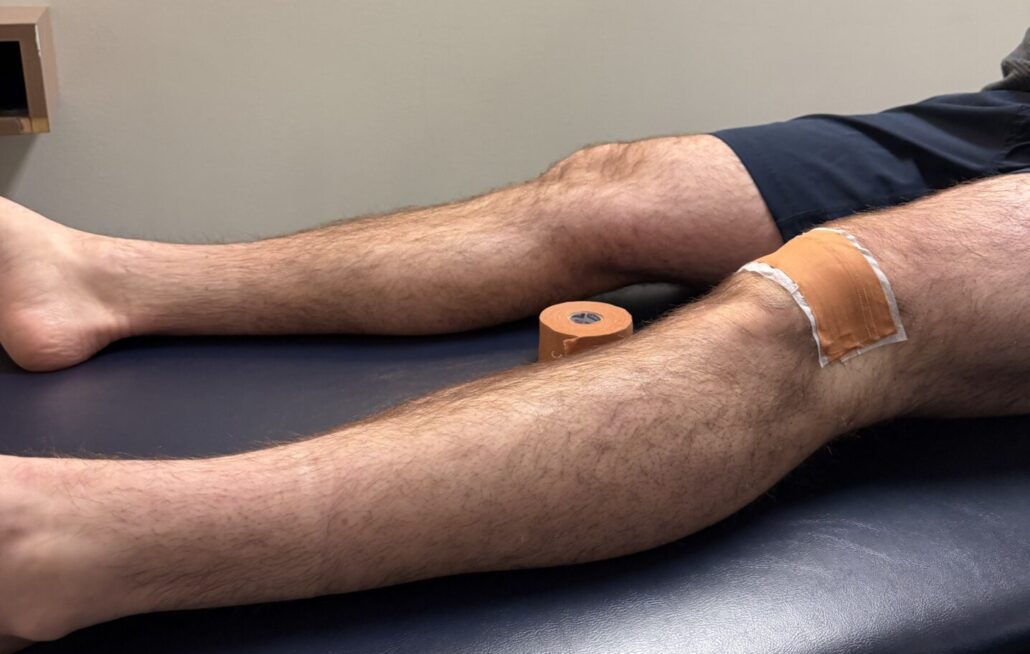
A 2023 systematic review supported that KT taping can reduce pain and disability across multiple body regions when used alongside other interventions (Tran et al., 2023). There are also some specific conditions that taping has shown to be beneficial for. In Patellofemoral Pain Syndrome, taping has shown to reduce pain and improve knee function when combined with exercise therapy (Gao et al., 2025) . Additionally, kinesiotaping may help with symptom reduction in cases of chronic low back pain (Sun & Lou, 2021). However, most of the research concludes that taping does not work well as a standalone treatment and does not reliably improve performance in sport.
Taping vs Bracing
Both taping and bracing can be used as strategies to improve pain and function.
When reviewing the research, there is no definitive answer as to which method is better,
As the evidence is mixed, choice can come down to patient preference. Taping is typically less expensive and can be great for short-term symptom modification or support.
However, I generally suggest trying bracing options in cases where patients may have benefited from taping and desire a longer-term support. Bracing tends to have fewer skin complications compared to taping.
Quick tips before taping!
Check skin for sensitivities/allergies before applying tape.
Prepare the skin (clean/shave if needed).
Do not tape over blisters, skin irritations, wounds, or areas with altered/ reduced skin sensation.
Monitor for skin irritations while the tape is on. Take the tape off if it becomes uncomfortable.
To Summarize…
Taping can be a beneficial tool within a rehabilitation plan! The evidence suggests that it should not be used as a treatment on its own, but is most beneficial when used in conjunction with exercise therapy. Most tape jobs are quite quick to try and are fairly straightforward. Another great aspect of taping is that you can also do most tape jobs on your own! I encourage patients to ask their physiotherapist if taping may be a good fit for them. When used in the right context, taping can be a quick and effective way to support you while you continue working toward your goals.
References
Gao, P., Yan, Z., Tang, F., Zhang, J., Zhang, Q., & Li, X. (2025). The efficacy of Kinesio taping combined with exercise therapy on patients with patellofemoral pain syndrome: A systematic review and meta-analysis.Journal of Back and Musculoskeletal Rehabilitation. Advance online publication. https://pubmed.ncbi.nlm.nih.gov/41143853/
Sun, G., & Lou, Q. (2021). The efficacy of kinesio taping as an adjunct to physical therapy for chronic low back pain for at least two weeks: A systematic review and meta‑analysis of randomized controlled trials.Medicine, 100(49), e28170. https://pmc.ncbi.nlm.nih.gov/articles/PMC8663828/
Tran, T., Nguyen, H., Le, H., & Pham, Q. (2023). Efficacy of kinesio taping compared to other treatment modalities in musculoskeletal disorders: A systematic review and meta-analysis.Journal of Clinical Rehabilitation, 37(4), 221–234. https://pubmed.ncbi.nlm.nih.gov/34711091/
https://www.treloarphysio.com/wp-content/uploads/2026/02/IMG_2474-e1771745945484.jpg10021420adminhttps://www.treloarphysio.com/wp-content/uploads/2019/09/logo-treloar-physiotherapy-clinic@2x-1.pngadmin2026-02-22 00:15:102026-02-24 22:29:06Taping in Physiotherapy — What It Is, How It Helps, and When It’s Right for You!
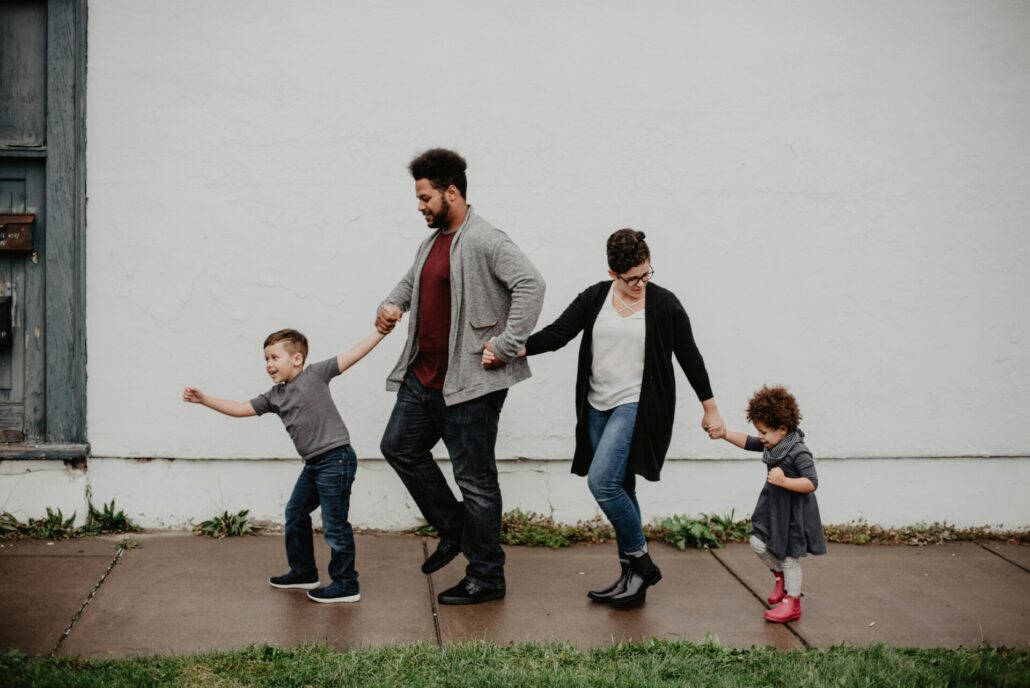
As a father of two young boys (aged 3 and 1), I know how physical parenting can be. Lifting toddlers, carrying strollers, changing diapers, and spending lots of time on the floor all add up. Most parents expect to be tired — fewer expect the aches and pains that come with it.
Caring for young children often puts our bodies into a flexed posture: rounded shoulders, tight hips, and a sore lower back. When this becomes your daily norm, pain can creep in.
Common Aches New Parents Experience & How to Stretch & Strengthen
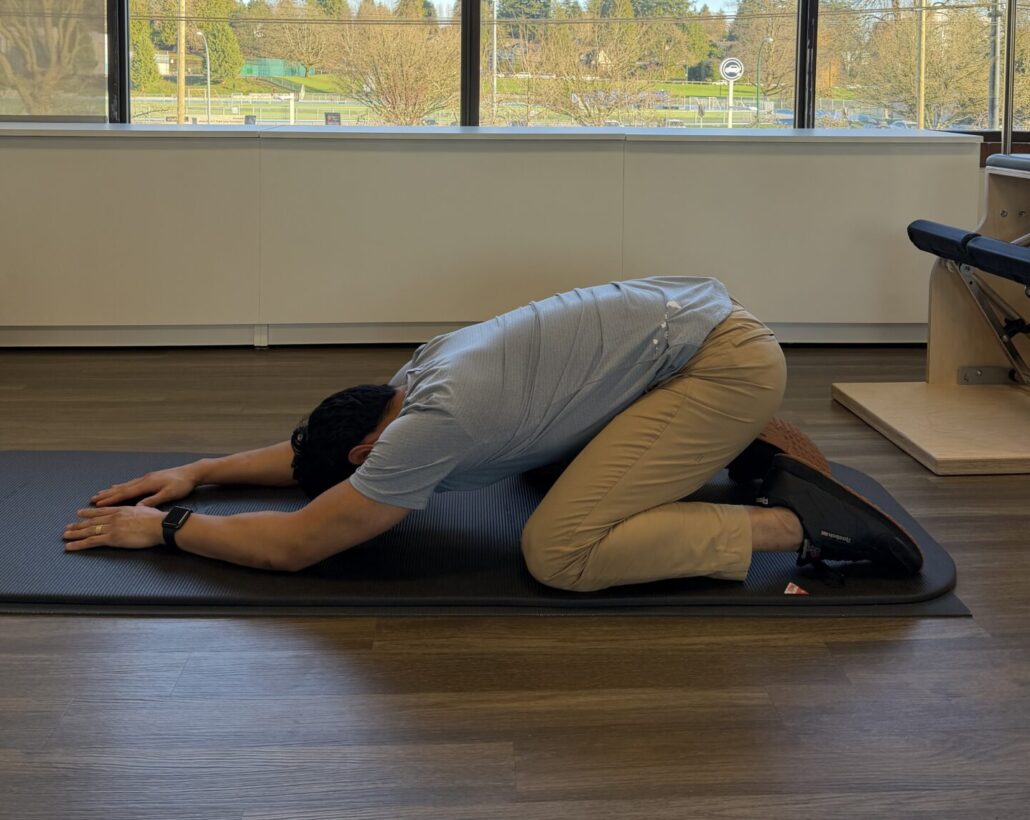
Lower back pain
Cause: Frequent lifting and bending
Stretch:Child’s pose — kneel on the floor, sit back on your heels, reach arms forward. Hold 20–30 seconds.
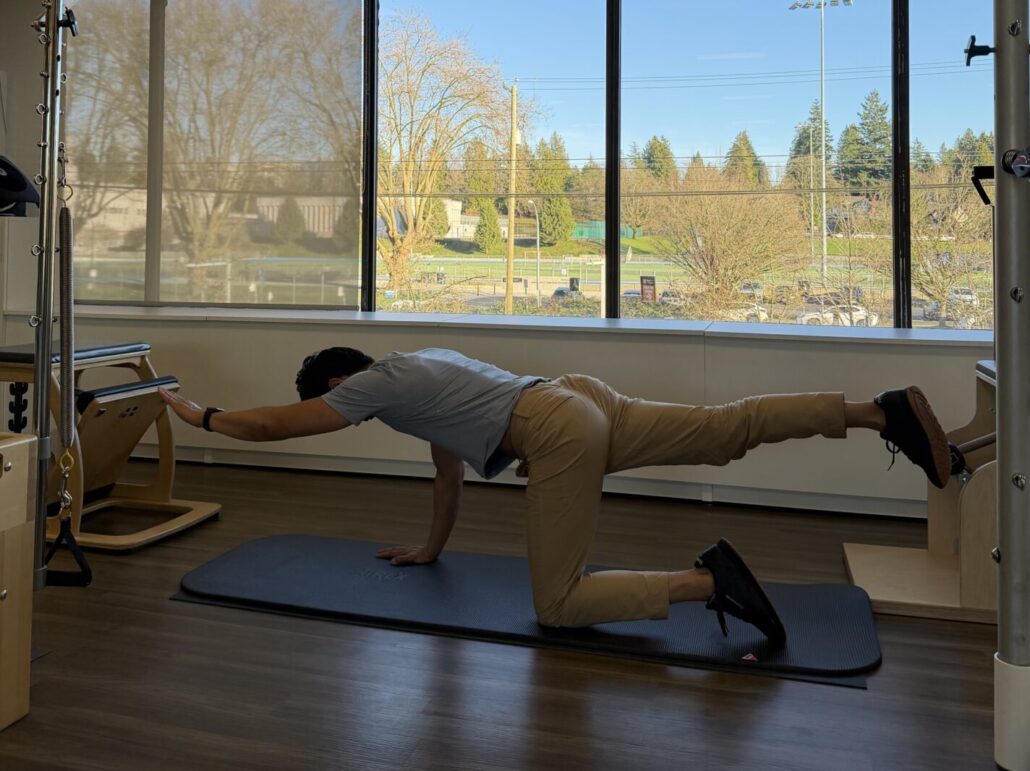
Strengthening: Bird-dog — on hands and knees, extend opposite arm and leg, keeping core engaged. Hold 5–10 seconds, repeat 5–10 times per side.
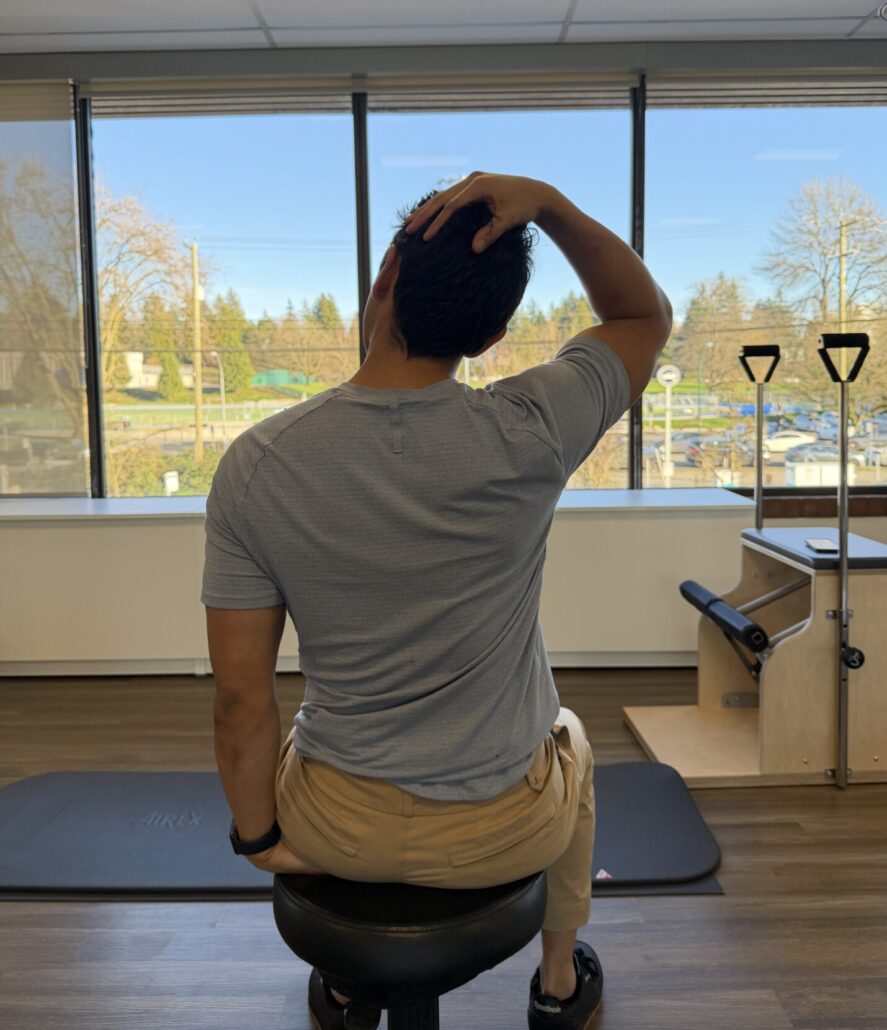
Neck and shoulder tension
Cause: Feeding, rocking, and carrying
Stretch:Upper trapezius stretch — gently tilt ear toward shoulder, assist with hand, hold 20 seconds each side.
Strengthening:Scapular squeezes — sit or stand tall, squeeze shoulder blades together, hold 5 seconds, repeat 10–15 times.
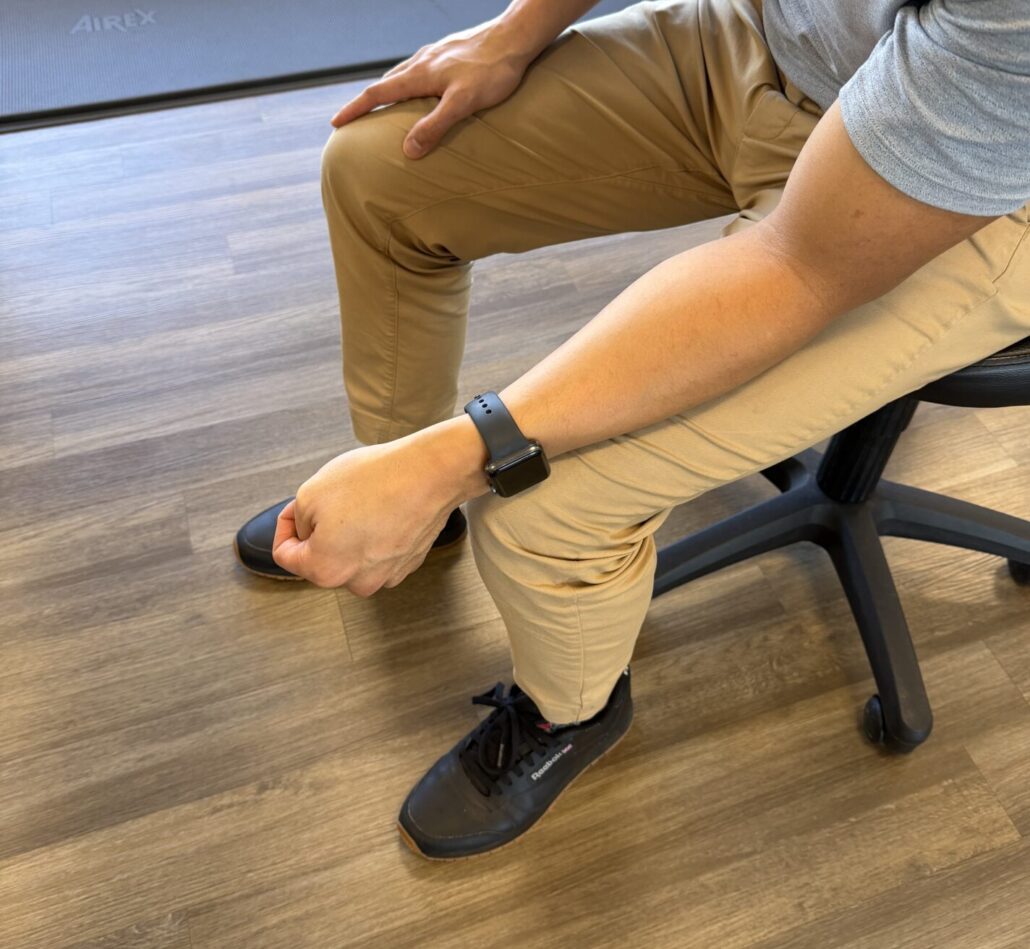
Wrist or thumb pain (“Mommy’s thumb” / De Quervain’s)
Cause: Repetitive lifting and gripping, particularly lifting from under a toddler’s arms.
Stretch:Thumb and wrist stretch — gently place thumb inside a loose fist, and tilt the wrist away from your thumb. Hold 30 seconds.
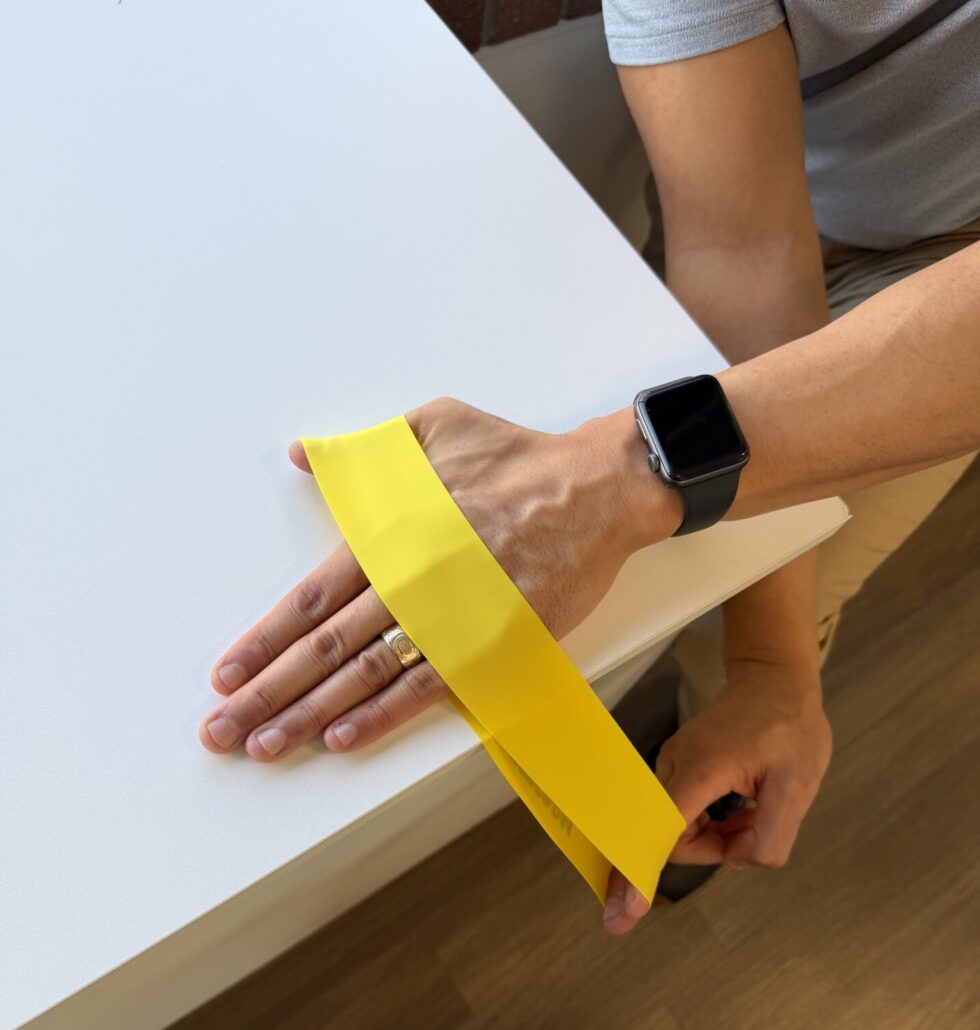
Strengthening (after an initial period of rest and/or bracing):Thumb extension — use a light resistance band around thumb and fingers. Slowly move thumb away from the fingers against resistance. Repeat 10 times.
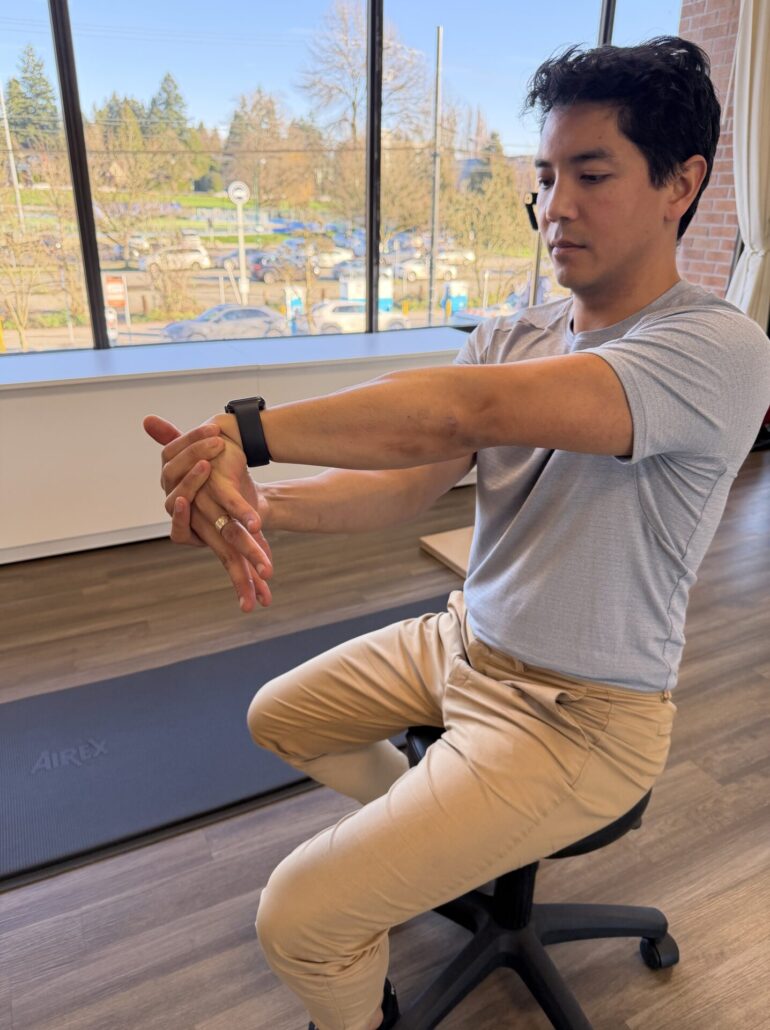
Forearm pain near the elbow
Cause: Sustained hold of baby
Stretch:Elbow extension. Extend elbow and pronate the forearm, and flex your wrist using your other hand. Hold for 30 seconds.
Strengthening: In this scenario, the stretching is often more important as you are building isometric strength while holding your baby!
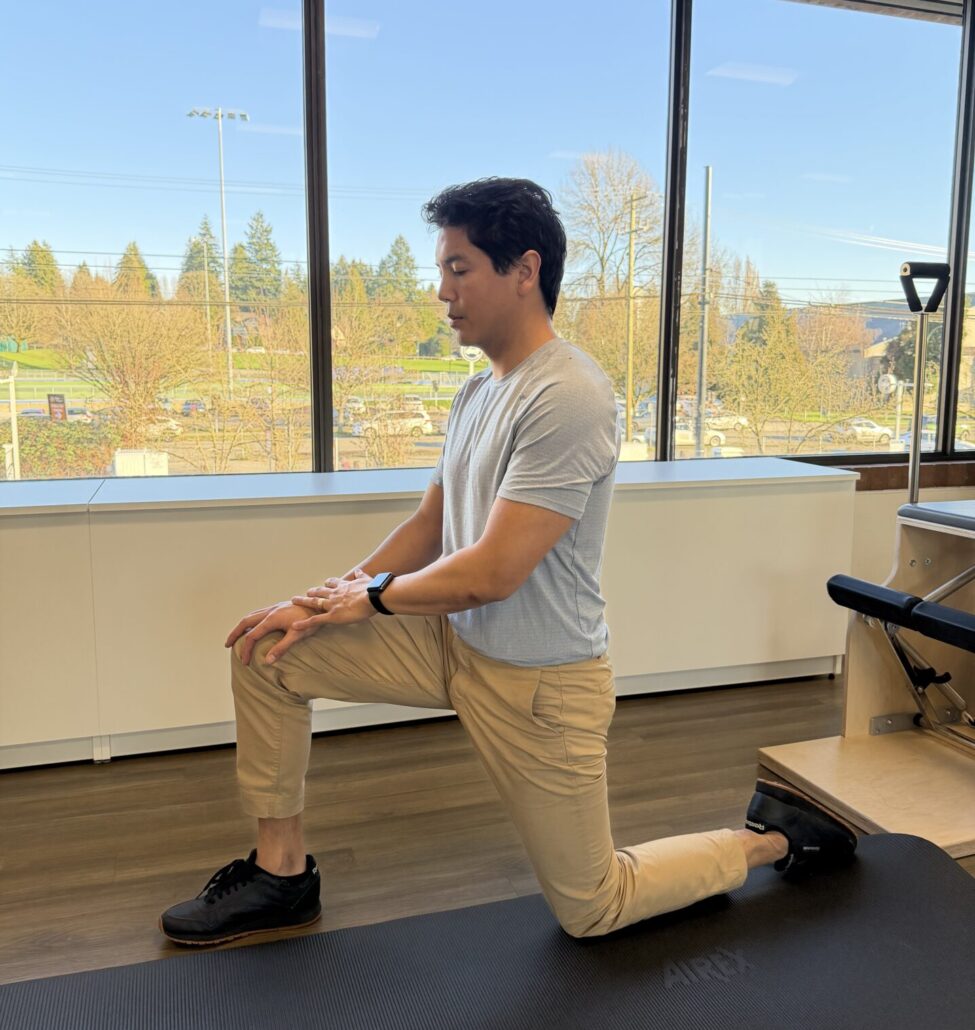
Hip tightness
Cause: Prolonged sitting or floor time
Stretch:Half-kneeling hip flexor stretch — one knee on the floor, other foot forward, gently shift weight forward, core engaged. Hold 20–30 seconds each side.
Strengthening:Glute bridges — lie on your back, knees bent, lift hips off the floor, hold 2–3 seconds, repeat 10–15 times.
Finding Time When There Is No Time
For most parents, finding extra time to exercise feels unrealistic. If this is the case, instead of adding something new to your day, I suggest to move with your kids. Toddlers love crawling, climbing, and playing — and many of these movements are exactly what our bodies need.
Play that helps your body too:
Crab walk: Opens the chest and strengthens shoulders, countering rounded posture.
Bear or lizard crawl: Builds core, shoulder, and hip strength while staying mobile.
Stretching during playtime: Use a half-kneeling position to stretch hip flexors while keeping your core engaged while staying at eye level height with your kids.
Even short bursts of play like this help reverse the hunched posture parents often develop. Physiotherapy can help you stay comfortable, confident, and able to keep up with your kids — now and as they grow!
https://www.treloarphysio.com/wp-content/uploads/2026/01/pexels-emma-bauso-1183828-2253879.jpg12821920adminhttps://www.treloarphysio.com/wp-content/uploads/2019/09/logo-treloar-physiotherapy-clinic@2x-1.pngadmin2026-01-18 14:15:432026-01-18 14:19:15New Parents? New Aches! Looking After Your Body While Looking After Your Kids (& Grandkids)
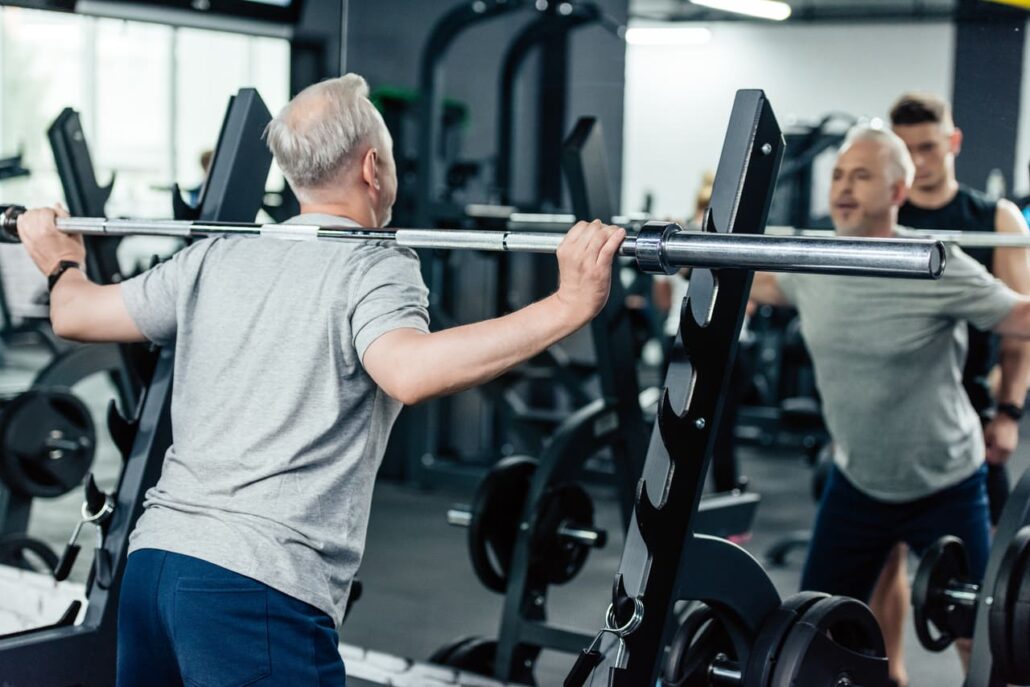
Strength Training: A Powerful Tool for Supporting Bone Health
When many people think of strength training, they imagine building muscle, improving fitness, or boosting cardiovascular health. But strength training offers another powerful—and often overlooked—benefit: improved bone health. As we age, this becomes increasingly important for maintaining independence, mobility, and overall well-being.
Understanding Osteoporosis and Its Connection to Muscle Health
Osteoporosis is a common condition in older adults, characterized by decreased bone density and an increased risk of fragility fractures. Closely linked to osteoporosis is sarcopenia, a condition involving the loss of skeletal muscle mass, strength, and function.
These conditions are closely connected because muscles and bones work as a team—they share anatomical, metabolic, and chemical pathways. When muscle strength declines, bone health often follows, making it essential to consider both together.
Why Strength Training Matters
Exercise—particularly resistance training—has consistently been shown to be one of the most effective ways to counteract age-related declines in both bone and muscle mass.
Resistance training may include:
Body weight exercises
Free weights
Resistance bands
Cable or weight machines
As muscles contract and generate force, they create beneficial stress on the bones. This stimulates bone-building cells and helps maintain or improve bone density over time.
Simply put: strong muscles support strong bones.
How to Begin a Strength Training Routine
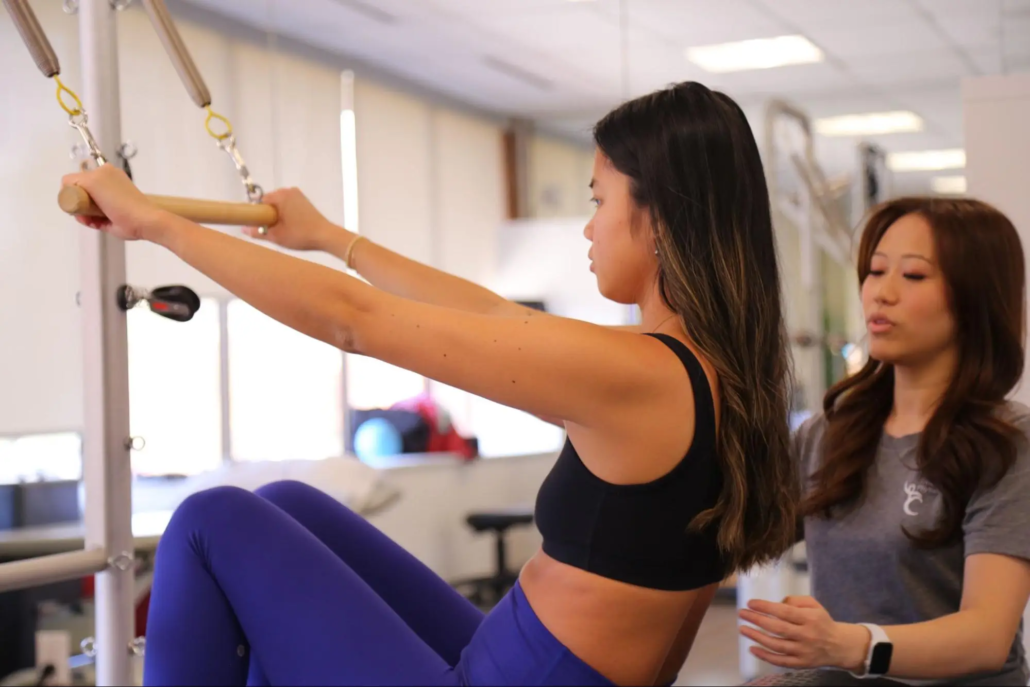
You don’t need to be a lifelong gym-goer to benefit from strength training.
Physiotherapists and Kinesiologists can perform personalized assessments and develop targeted exercise programs tailored to your health status and goals—especially helpful for individuals with osteoporosis or those concerned about injury prevention.
Make sure to read to the end for a video demonstrating simple resistance exercises to get you started!
Take the First Step Toward Stronger Bones
Ready to build strength, confidence, and healthier bones? Here are three ways to get started:
Book an Assessment: Schedule an appointment with one of our Physiotherapists for a customized strength and bone-health program.
Join a Beginner Strength Class: A safe, supportive environment to learn proper technique and gradually build strength—perfect for those with osteoporosis or new to resistance training.
Try Our Starter Exercise Routine: Watch the video included below and follow along at your own pace to begin building foundational strength today.
Your future mobility, independence, and confidence start with a single step. Let’s take it together.
https://www.treloarphysio.com/wp-content/uploads/2025/11/In-Home-Care-i-Stock.jpg12801920adminhttps://www.treloarphysio.com/wp-content/uploads/2019/09/logo-treloar-physiotherapy-clinic@2x-1.pngadmin2025-11-26 11:22:242025-11-27 16:33:21Stronger Bones, Stronger You: How Strength Training Supports Bone Health as We Age
The 2025 Women’s Rugby World Cup Final was played just a month ago in front of record-breaking crowds, and Canada’s dominance through the tournament reflects the rise in contact sport participation in Canada². As good as it feels to break a tackle or slip past a hard check, we know it doesn’t always go according to script. Whether it’s an ankle knock, a shoulder issue, or even a concussion, we’re here to make sure you have a concrete plan to get back on your feet efficiently and safely.
Contact Considerations
It goes without saying – contact is complicated! Regardless of the sport, entering contact is technical and requires a careful combination of learned skill and physical force¹⋅³. When breakdowns in these areas occur, injury risk can increase—which might mean you’re checking in with our team sooner than you may have expected.
A physiotherapy initial assessment will gather information regarding your injury and will test different structures depending on the nature of your injury. This helps us understand the severity of your injury and determines where the recovery starting line is. Remember, this is a team effort! An effective recovery plan is a collaborative effort between the therapist and you – there are no cookie-cutter rehab programs here.
I’m Out of Pain – Now What?
Stepping back on the training pitch can feel daunting, but this is where a structured rehab approach really shines. There’s a fine balance to keep: too aggressive and we risk re-injury, but being too cautious can lead to unnecessary delays. Your physiotherapist will work with you to determine your specific training targets depending on your injury and sport demands to make sure you get back to training safely, efficiently, and confidently, which could look like the example below.
Sample Return to Contact Progression
In-clinic Testing
– Indicated by the type of injury, your physiotherapist may test for limb strength asymmetries, muscular/cardiovascular endurance, reaction time, and/or sport-specific balance.
Non-contact training
– Individual or team training focused on technical skills at an increased intensity without contact. Typically completed without protective equipment to encourage a focus on technical quality without the “autopilot” contact focus to build confidence on-feet.
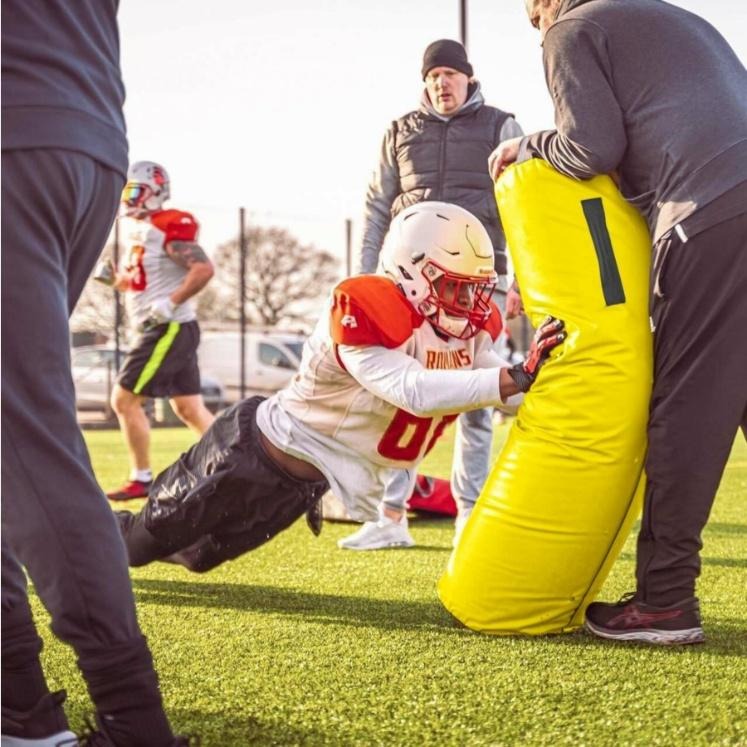
Contact Exposure – Pads
– Team training where contact is initiated by you against a tackle bag or foam cushion. Specifically non-person contact to build confidence and dose intensity appropriately. This session may also include you receiving contact from these tackle bags, but not directly from other players.
Contact Exposure – People
– Team training with individual drills where you give and receive contact to/from other players in controlled drills. This is typically submaximal at a “training intensity”.
Contact Exposure – Match Simulation
– Team training at full match intensity with full contact in short durations. This typically starts with controlled drills and should progress to unstructured or unplanned reactionary match situations.
Match Play
– A reduced-minutes return to match exposure.
Return To Play Monitoring
Stepping back into the matchday squad is an exhilarating feeling, but this doesn’t mean you’re being thrown back without support. Your physiotherapist will continue to modify your Return To Play structure as needed in collaboration with your coaching staff and yourself to make sure the last pieces of the rehab puzzle go according to plan. There should be a smooth handoff from your rehab team back to your performance team, and you can continue check-ins with your physiotherapist through this process as needed.
Taken a knock and looking to get back on your feet? Come by for a chat and let’s get started!
Martin, E., Beckham, G. Force production during the sustained phase of Rugby scrums: a systematic literature review. BMC Sports Sci Med Rehabil12, 33 (2020). https://doi.org/10.1186/s13102-020-00174-z
Sport Participation Among Children and Youth. Canadian Fitness and Lifestyle Research Institute. (2024, June 25). https://cflri.ca/publication/sport-participation-among-children-and-youth/
Trewartha, G, Preatoni, E, England, ME & Stokes, KA 2015, ‘Injury and biomechanical perspectives on the rugby scrum: a review of the literature’, British Journal of Sports Medicine, vol. 49, no. 7, pp. 425-433. https://doi.org/10.1136/bjsports-2013-092972

 )
)